Two years ago, we were in the midst of our European Adventure. Since returning, I have been working on going through and editing images from the trip – all 88,000 of them. The end goal is to complete a set of photobooks documenting our adventure. Given that it has been two years, one would think all the editing is complete and the photobooks printed – WRONG!!! In all honesty this has become a long term project, but I just hit a small milestone – I just finished a photobook, containing our favorite images from the trip.

Here is the story of how the photobook – “Best of Europe 2018” – came to be …
A few months ago, SAAL Digital Corporation put out a call for photographers/graphic designers to create a photobook using SAAL’s line of products. I responded to the request, and to my surprise, I was awarded a voucher to use towards the printing of a photobook. Upon receiving the voucher and looking through their photobook product line, I decided to use the voucher to produce a photobook containing our favorite images from the 2018 Europe trip; thus, it was titled “Best of Europe 2018.”
It took six weeks to design and layout the photobook. About four weeks ago the completed version arrived in the mail, and I have to say I am 100% satisfied with the final product. I have been showing it off to everyone I see!!!
Before seeing SAAL’s call for photographers, this was the first time I had heard of this photobook publisher. Additionally, it was the first time I interacted with their products and design software. This first introduction was extremely positive and I am glad I had the opportunity.
Given that this was my first time working with the SAAL software and printing a photobook with them, I want to discuss my experiences with their services, software, and, ultimately, the final product.
One of the first things that stood out about SAAL was that their website was very interactive and provided a good overview of their products. I also noticed that the design and layout for the photobook took place using locally downloaded software and not by editing via the Internet. The software took only a few minutes to download and install. At first, I was not sure about this, but this quickly became one of my favorite features in regards to designing and laying out a photobook using SAAL.

Before continuing, I should mention that SAAL offers two other options for designing/creating photographic projects. First, there is the PDF Upload, which allows one to use a plug-in from SAAL to design the photobook using an external software program. Once the layout and design of the photobook is done, it is then uploaded to SAAL for printing. The other option is the SAAL App, which allows you to create not only photobooks but also cards and wall décor from your mobile device. I did download the app, although I did not use it to create this photobook. The SAAL App appears it would work well for one who wants to design photographic projects on the go or from the convenience of their mobile device. Through the app, you can easily layout and print countless items. While neither of the options was used for this project, I am hightly considering the first option for future endeavors.
Selecting the Photobook
After installing SAAL’s design software on my desktop, I went through and looked at all of their photobook options. I finally settled on a 12 x 12 photobook from their professional line. In terms of options, I selected the acrylic and leather cover, with glossy photo paper for the spread (or pages). For the number of pages in the book, I chose the 52-page option, but then ended up adding additional pages. When selecting how you are going to layout the photobook, three options are available – auto layout, one-minute photobook, and empty template. The auto-layout provides for the automatic positioning of images, but this feature can be disabled at any time, and you can design (a) page(s) yourself. Through the one-minute photobook option, the photobook is automatically designed for you. Then, the empty template lets one design the book freely using your creativity and vision to create a book that is very individualistic and personal. With the empty template, you still have access to page templates, framing and shadowing options, and clip art. For this project, I selected the empty template.
Layout and Personal Design
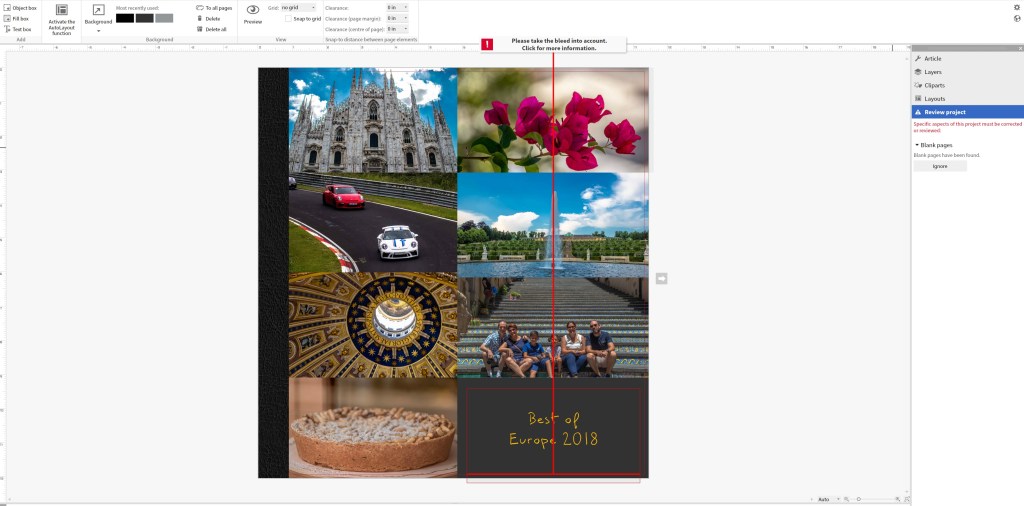
After selecting all the basics physical design aspects of the photobook, the SAAL software then opens to a blank design layout page. While the layout looks very basic, it has everything you need to design a top of the line, professional, photobook. If this is your first time using SAAL’s design software, there are online tutorials, which explains the various features. Their online tutorials also contain videos on how to design creative covers, use backgrounds, and clipart. Additionally, they also have video tutorials that discuss and provide general design inspiration. One can browse SAAL’s video tutorial library from the following link: https://www.saal-digital.com/service/video-tutorials/
Overall, I found the design software easy to navigate. On the right hand of the screen is a multi-layer bar where you can access options for the physical design of the book (under article), work on layers, access clip art, and layouts. There are both premade layouts for the cover and pages. The panel running across the top contains buttons for the addition of text, objects boxes, and changes to the page background. Also found on this panel is a button that will allow you to activate the auto-layout function. Once this button is activated, suggested layouts will appear under layouts on the right. Suggested layouts are dependent on the number of photos on a page and if an object or text box is present.

On the left-hand side of the screen is where you view and link to your images. In the image source bar, you can easily map to drives or folders on your computer. The function of the image source bar was another of my favorite features. It made accessing your images into the design easy. Additionally, from here, images could be easily be dragged and dropped onto a page during the layout process.
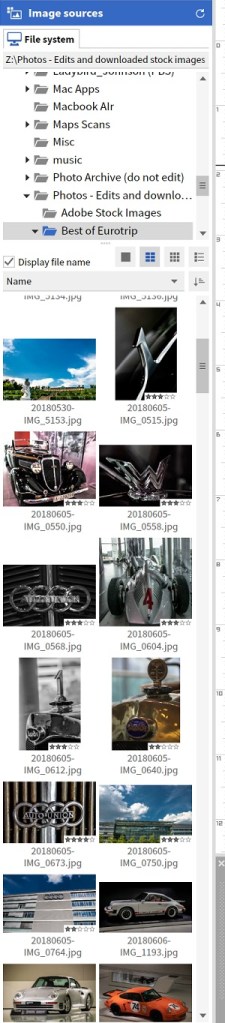
The bottom portion of the screen contains a scrolling bar. The scrolling bar allows you to move between pages quickly and also view thumbnail images of pages. Below the scrolling bar is the price of the book. The cost of the book adjusts as you add or take way pages or other features associated with the price of the photobook. I found both of these features helpful throughout the design and layout process.
As a creative person, who often approaches a photobook project with a vision of the end project already in mind, I found that the empty template provided me with a blank canvas for my imagination to come to life. For over two years, I knew which images I wanted to include in a “best of” photobook, and I already had them pulled together in a folder. One of the visions I had for this photobook was a collage of images on the front cover. Before discovering SAAL’s software, I had been trying to make this vision come to life with various other photobook software/photobook services but had been unsuccessful. When I began using SAAL’s software, it was seamless and came together almost instantaneously. The front cover of the photobook is probably one of my favorite “pages” or aspects of the book.
One feature of SAAL’s software, which made the layout process seamless, was that it had a ruler on the top and right side of the book. While a ruler in the layout space is a simple feature, it is often overlooked by many mainstream photobook software companies, such as MILK and Artifact Uprising. Not only did the ruler help me create a symmetrically designed cover, but it also allowed me to make sure that images were centered and positioned similarly throughout the book. Along the same lines of the ruler is a red line found around the edge of each page. The red line is a guide for photo placement and helps to ensure that images, objects, and text boxes do not get cut off.

SAAL also has a feature in which they indicate the quality of each image. The image quality indicator not only helps to ensure that images will print in good quality, but this also helps photographers or image editors to see if an image has been over or under edited. There were a couple of images I went back and re-edited after seeing their quality level.

I should note here that a front/cover page or end page is not a standard feature. If you want to have a blank page at the beginning or end of the book, you will need to consider this in your layout and/or in your page count. As I stated above, I included a cover page, but then I also added a blank page at the end of the book. All of this was my personal preference.
The biggest issue I had when laying out the photobook was remembering to SAVE. Autosave from other programs has me spoiled. The SAAL design software, however, does not contain an autosave feature. I learned this the hard way. One evening I forgot to save my work, walked away from the computer, and an auto-update occurred, forcing the SAAL software to close when my computer rebooted. I ended up losing about three-fourths of a completed book. After this, I began saving after each page edit.
Finalizing, Printing, and Shipping
When it came time to finalize and to submit the book for printing, I was a little nervous. However, SAAL has a review process in place that helps to review the photobook to ensure that everything prints correctly. The review process ensures that both text and images are correctly laid out and will print without issue. The payment and information for shipping is done in a very secure fashion. All of this went flawlessly.

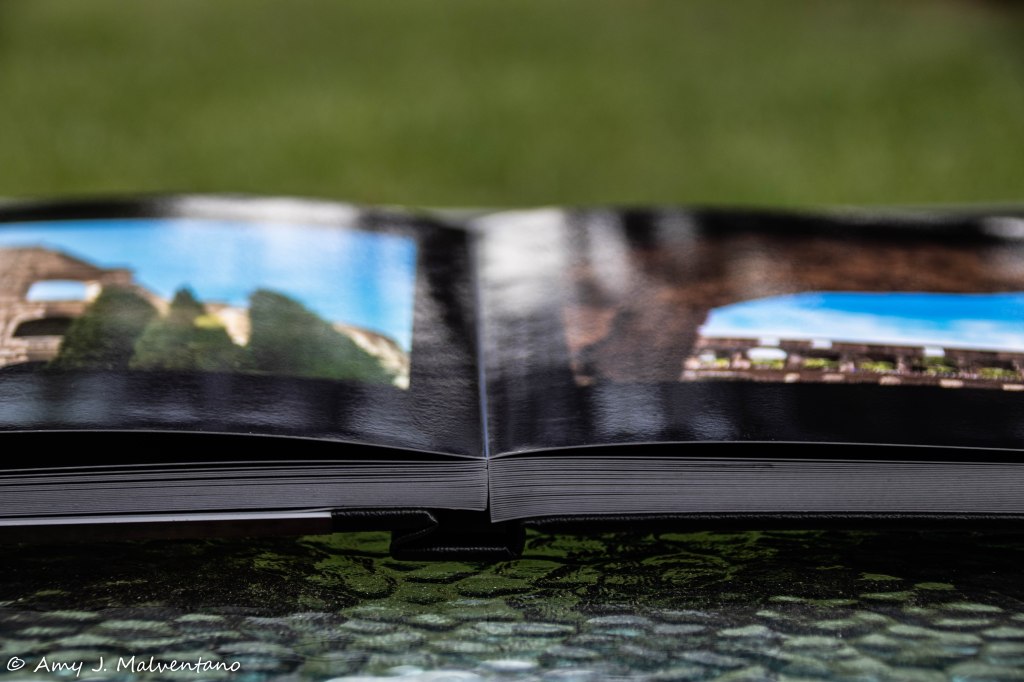
The acrylic cover was impressive – excellent quality, and it took the photobook’s look to a whole new level. After showing the book off to a few people and taking it with me a few places, I am a little worried about the acrylic cover getting scratched, so I am thinking about putting a transparent plastic cover layer over it for protection. For shipping, a plastic protective wrap protected the acrylic cover, but I removed the plastic when unpacking the book. Honestly, we are so impressed with the cover; we want to make sure it is protected long term.
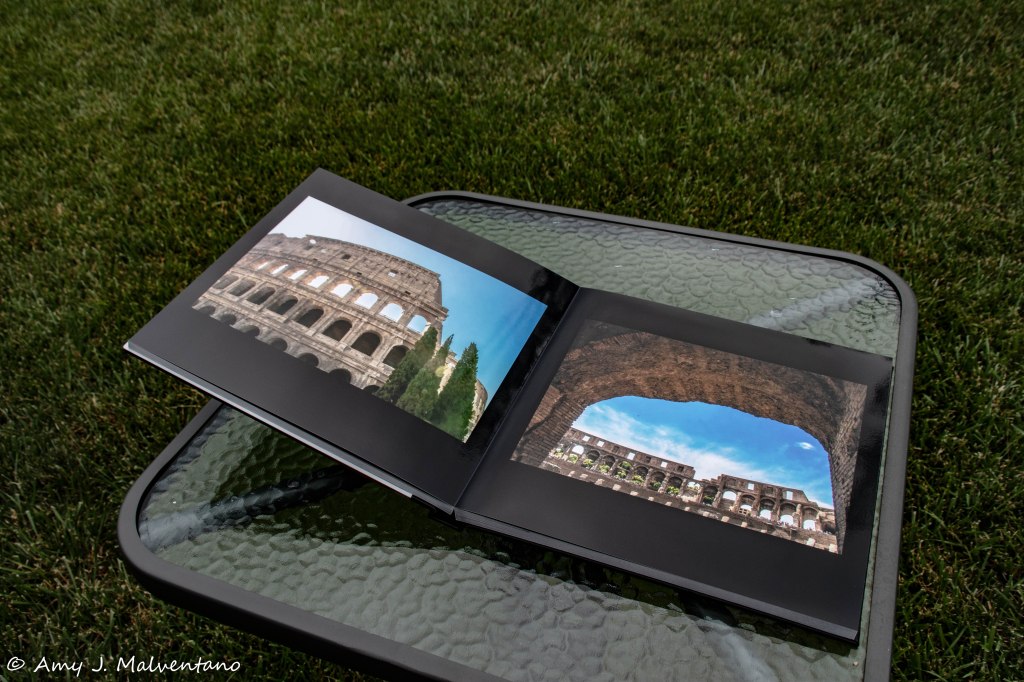
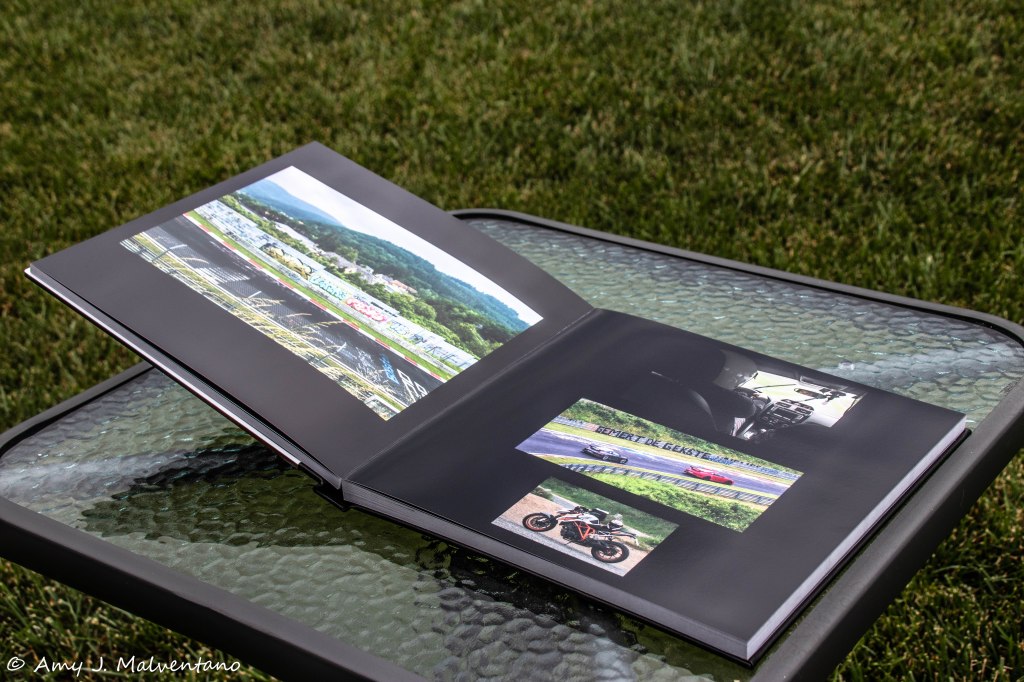
The leather binding was nicely done, and the quality of the leather was exceptional. Since the book was done in the lay-flat format, the book opens nice and full without causing damage to the book’s binding, leather spine, or the pages, plus it makes looking at the pages easy.
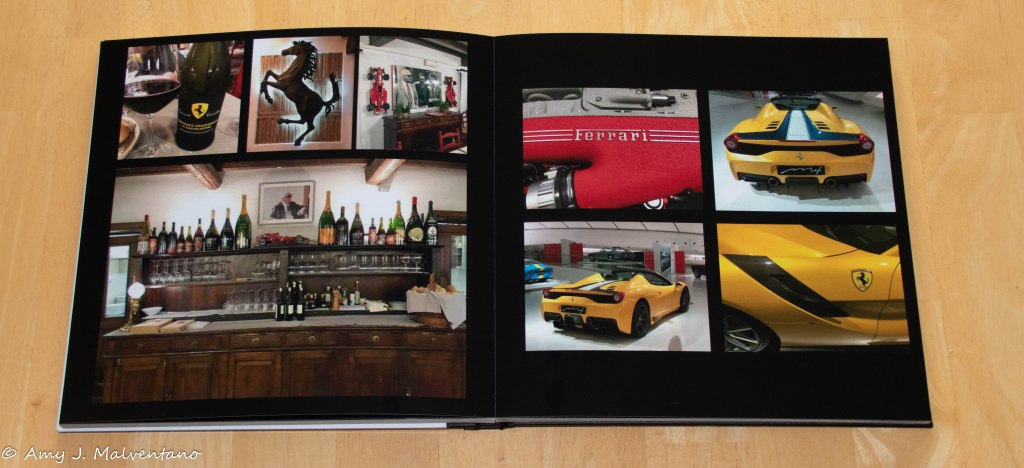
The print quality of the pages is excellent. I was worried that a few of the images would not print correctly because they were only of “good” quality and taken with a cell phone, but they printed out nice a clear. In fact, it is hard to tell which images ranked as good quality and which ranked as excellent quality, all came out nice in the printed photobook.
I was also concerned how the pages would look once printed, given I chose to do a black background. Yet, the pages printed flawlessly, and there was no streaking with color. Each page looked like a professional print.
Overall, I cannot say enough good things about the final product. Selecting the professional line photobook with an acrylic and leather cover is what brought this project to life. It has definitely made this photobook not only a conversation piece, which is now nicely displayed in the living area of our home, but it provided me with a photobook that I want to show off and will treasure forever.
Final Thoughts
I originally envisioned this “best of” photobook, when we were returning from our European adventures in July 2018. I had these images edited and picked out for almost two years now, but I could never find the right photobook option which fit my vision for a photobook until I came across SAAL’s line of photobook options. Designing and laying out the photobook was extremely simple once I got the hang of the SAAL design software (which only took a few minutes). One of the things I enjoyed most about the design and layout process was that I could do it from my desktop and did not have to do so through an Internet interface. The print and binding quality were top-notch as well. Overall, I am incredibly pleased with the final product.
General Overview and Pictures of “The Best of Europe 2018”
— 12 x 12 Professional Line Photobook
— Acrylic and leather cover – the front cover is acrylic, and the spine and back of the book is black leather.
— Glossy photo paper for the page spread
— 52 pages initially (more pages were added throughout the project, for a total of 102 pages)
— Empty Template – No template or auto design/fill used


All images featured in this photobook – “Best of Europe 2018” can be found in the following gallery: https://canonscanon.com/portfolio/best-of-europe-2018/
Additional images from our 2018 European Adventure can found on galleries on the home page (www.canonscanon.com). As editing continues, new images are continually added.
This post will also appear on my personal blog (www.findingamy.net)
